KnobbyBrute

Table of Contents
It’s 909 day so it’s time for a synth post! Though not a drum machine, an equally cool device all the same. Here’s the story of how I finally found the perfect solution for prettying up my beloved MicroBrute by replacing the cheap rubber knobs.
Soft Touch#
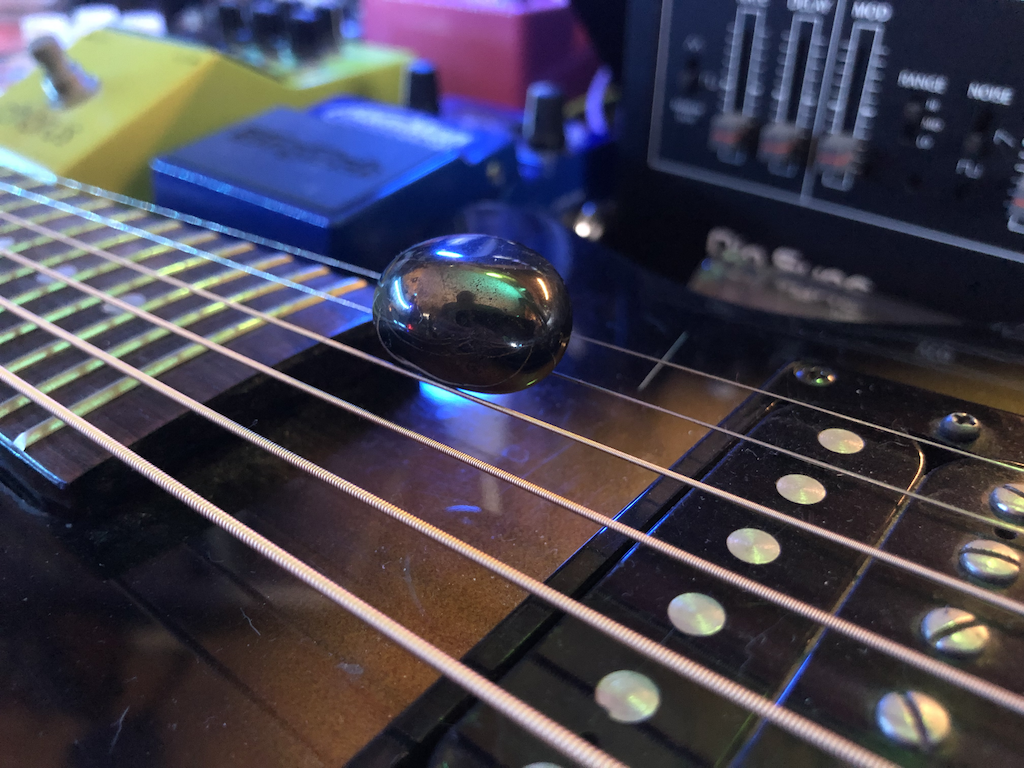
This horrible idea.
If you’re unfamiliar, “soft-touch” is a coating on plastic parts that feels like a thick setting of rubber with a squishy sort of soft matte finish to it. I recently learned that the interiors of Ferrari supercars were outfitted with the material and apparently companies exist that specialize in its maintenance because of this.
Now, I am no expert on rubber, but I do have experience with the rubber elements that hold musical instruments together. In a lion’s share of cases rubber is the first thing that needs replacement. Soft-touch coated plastic components are no exception, becoming tacky with age.
None of the devices I own that feature the stuff come with clear instructions on how to clean it. Some are outfitted entirely in a soft-rubber case, others just in “the hand-held” sections (think audio field recorders). In every instance the rubber is getting filmy and sticky and disgusting to use, ironically on the very components that were specifically designed with soft-touch rubber because humans.
Maybe this is related to cost. I have what appear to be soft-touch rubber on other admittedly much more expensive pieces of gear (per function, e.g. a single synth module) that have not yet shown any signs of sticky decay. In some cases, the rubber has simply worn down and smoothed out. Is it just better quality control?
A great many rubber “cleaning” techniques involve not cleaning but removal of the old de-volcanized rubber on the surface. This reveals stronger layers underneath giving a clean appearance, which will of course also decay in the same way. So some services replace it entirely.
That’s what I did, although ultimately not with rubber. With machined aluminum.
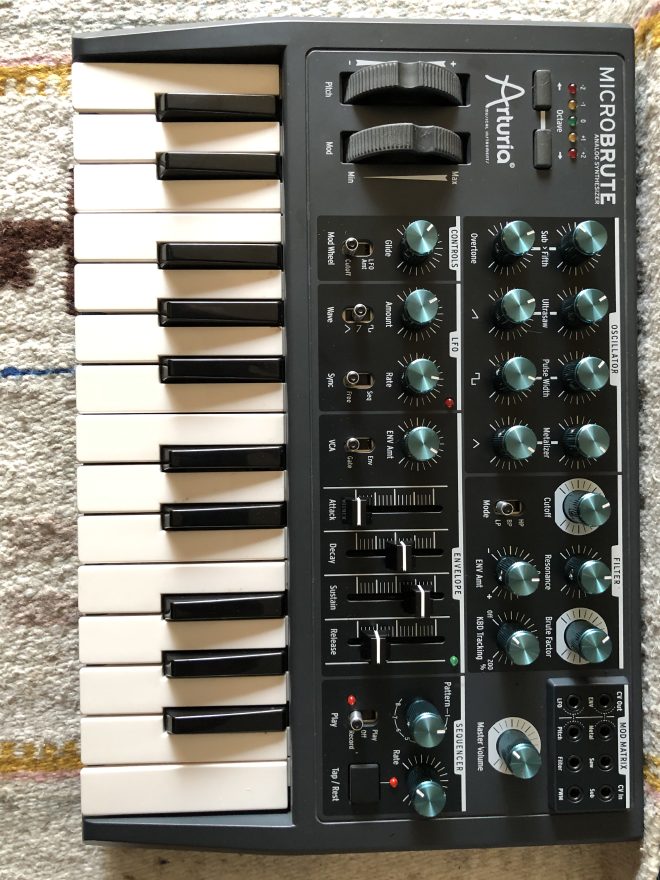
MicroBrute#
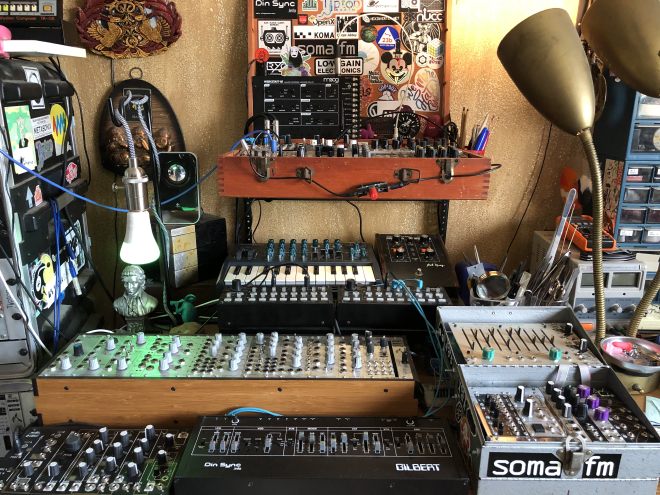
This instrument from Arturia interested me when it was released because of its special onboard filter based on the original Steiner-Parker Synthacon, a sound I liked and didn’t have anywhere in my rig. Plus this little 1.5 octave triple VCO powerhouse is also a semi-modular, with multiple I/O that can be used onboard or externally. I use it a great deal with interfacing modular synth gear.
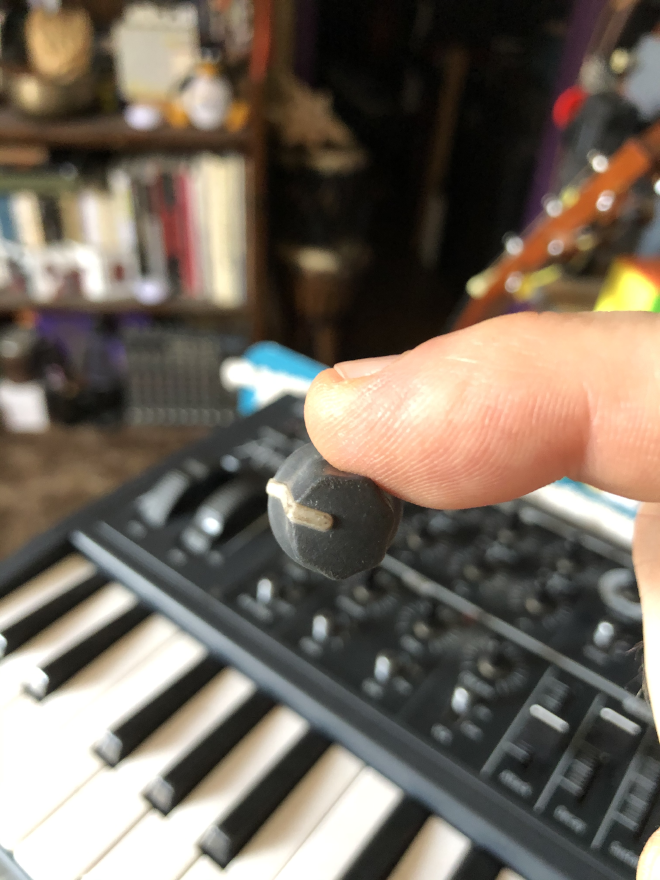
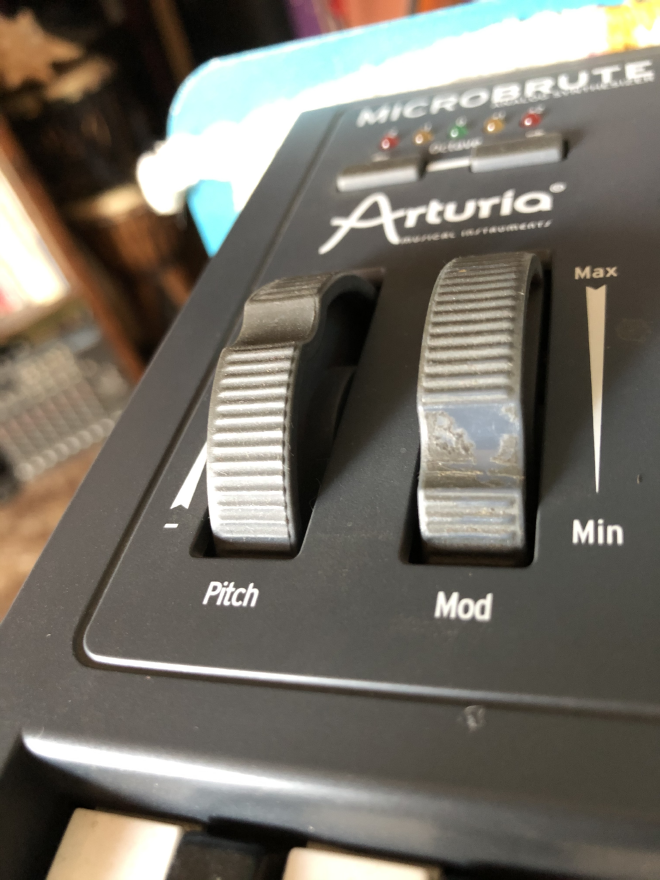
Unfortunately, several UX parts are coated in soft-touch rubber: the knobs, two switches, the slider caps, the expression wheels. As this stuff ages it loses the magical state it gained during a chemical process called vulcanization. This makes rubber harder by connecting molecular strands together. So, as the strands decompose, the rubber reverts closer and closer to the natural state of being sticky.
Cleaning wouldn’t be that huge of a chore… however, from personal experience I can tell you it is a slippery slope. Depending on the quality of the rubber and the amount of decay it has suffered, you may “clean” most of the rubber clean away.
Mine were so decayed they were beyond tacky to outright sticky. I have other gear that is getting worse. However, I have to give a point to Arturia for making (most of) these parts replaceable.
I could find replacements easily! I thought. That didn’t turn out to be the case.
The Search#
There are 20 soft-touch knobs on a MicroBrute, which I noticed were something called “D-shaft”: an amount of pressure is required to keep the knob on a shaft shaped like the capital letter D. They can be hard to remove but are typically cheaper to manufacture (hm, I sense a theme).
What I failed to notice at first was the orientation of the D.
You see, I knew of a local US modular synth parts outfit with nice slider cap replacements and oooh these D-shaft soft-touch knobs match the original design kinda! Only when I had them in-hand and tried them out did I realize the pointer on the knob on the MicroBrute was 90° from the flat side of the D, whereas the ones I ordered are the more popular 180° away.
Oops.
I found uses for the new knobs, I do a moderate amount of SynthDIY. So no big loss. However, the MicroBrute sat still sticky for months longer until I accidentally stumbled on a solution.
(Bitches) Love My Switches#
I’m working on a modified Music From Outer Space Noise Toaster and needed a large set of matching knobs in a couple of colors. I also wanted a place that was US so I could trust shipping. Pretty quickly I landed on Love My Switches. This site did not cross my radar for very long in prior MicroBrute searches because of the D-shaft type, so I wasn’t even thinking about the Arturia when shopping for the DIY.
It got interesting when I noticed I would have to mix knurled shaft knobs with smooth shaft knobs on the Noise Toaster. The difference there is also the mounting style: knurled is another design that requires mechanical pressure to stay, smooth depends on a set screw in the knob. I prefer set screw in almost every situation but they’re not always practical, nor are all potentiometers sourced equally.
Eureka!#

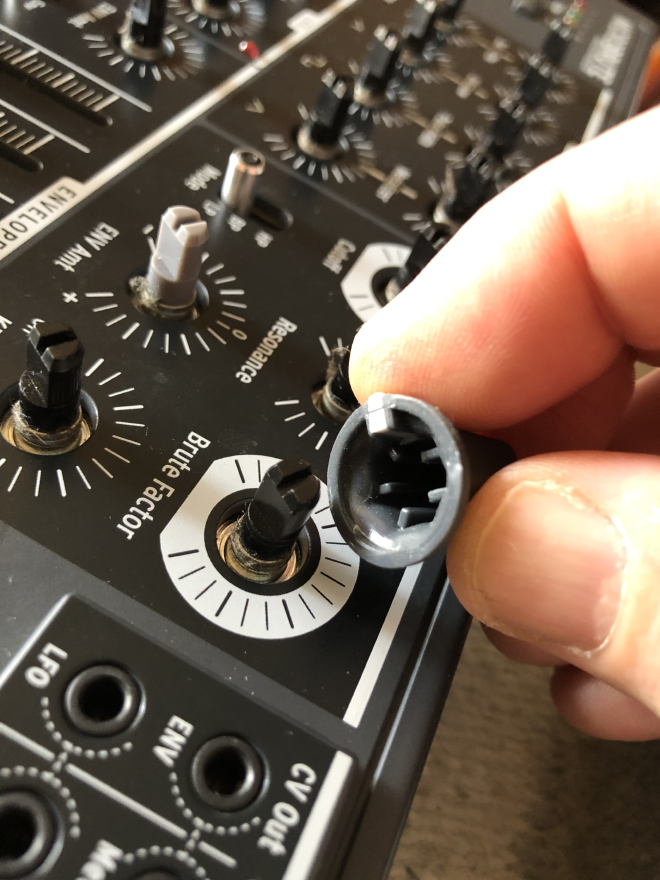
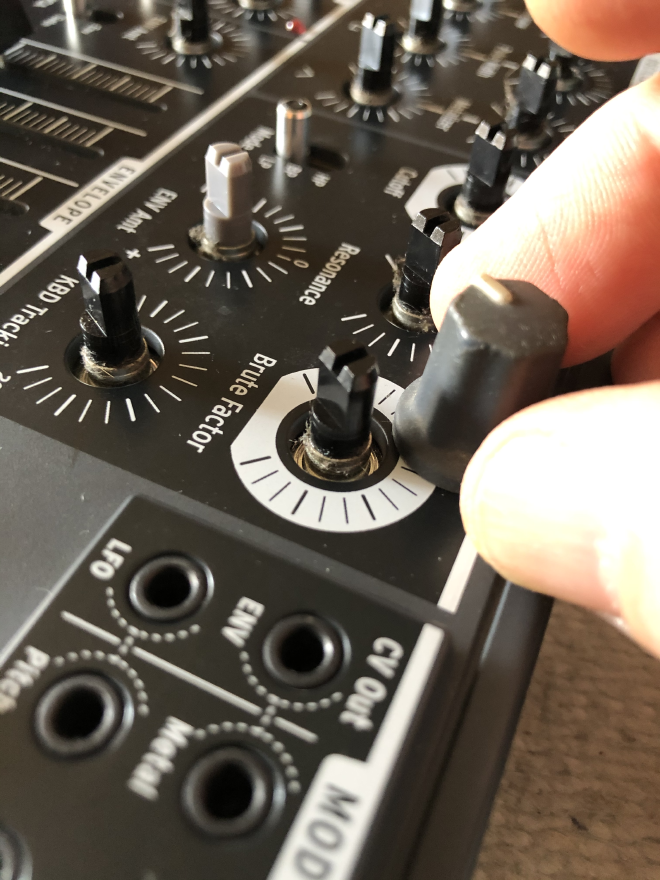
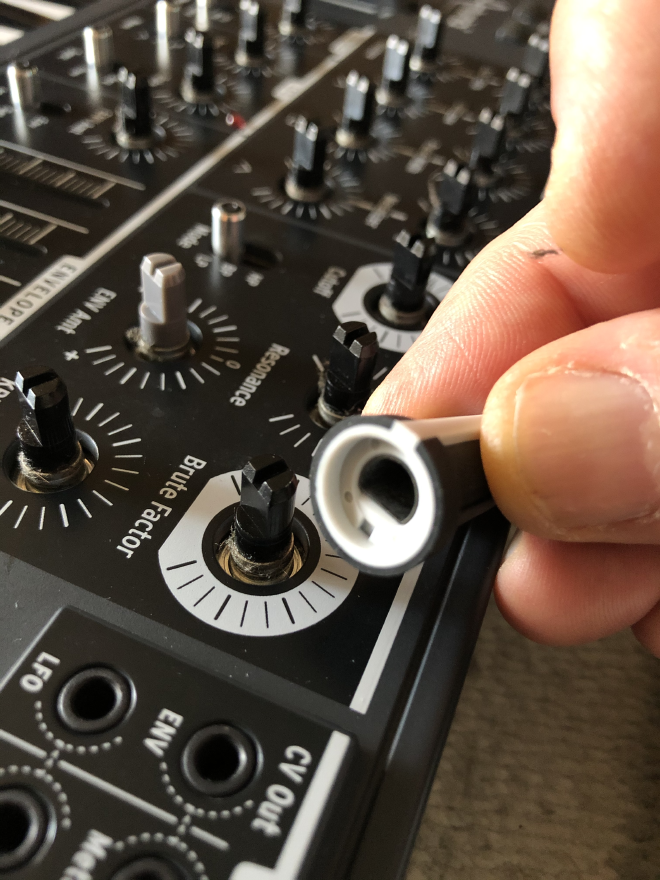
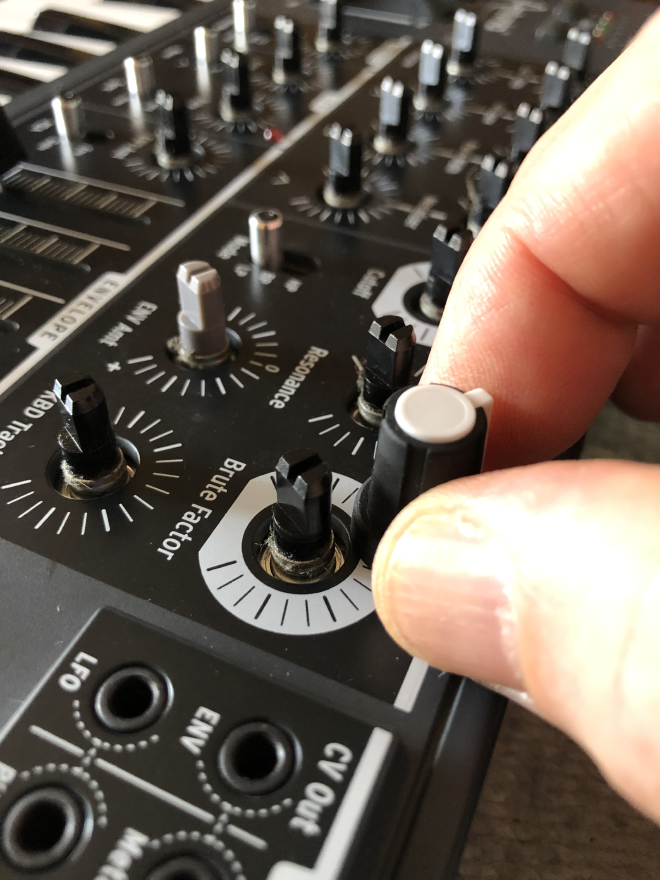
Enter the brass adapter, which allows using a set screw knob on most non-smooth shafts. I ordered them for the Noise Toaster, so I decided to try them on the MicroBrute. Lo and behold, they worked! Instead of empty space behind the adapter in the usual 180° D-shaft shape that would not guarantee a snug fit (and the site does warn about this), there was half a shaft to support the force in front of the adapter. You couldn’t tell there was anything odd about the knob at all.
I was going to take another gamble though, because I noticed two were different components underneath (a detent pot and a rotary switch). Lawrence helped me here by pointing out several options, one of which was thin enough to look good with an internal skirt that should clear any weird shafts.
The Magpie#
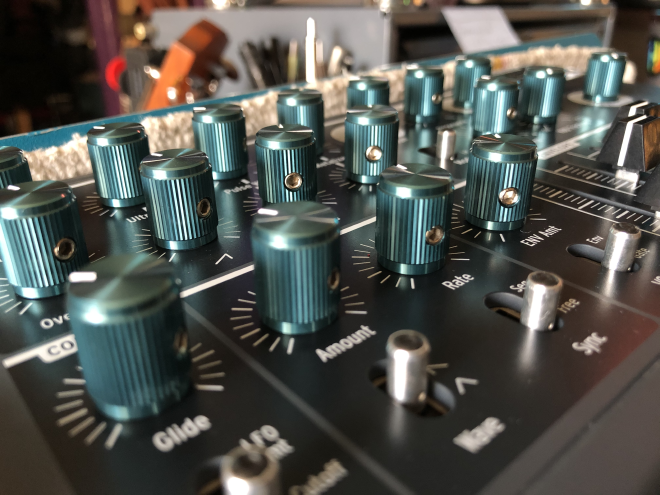
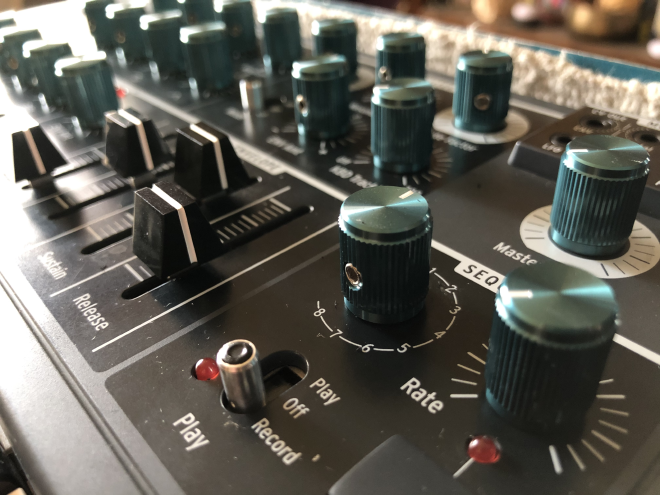
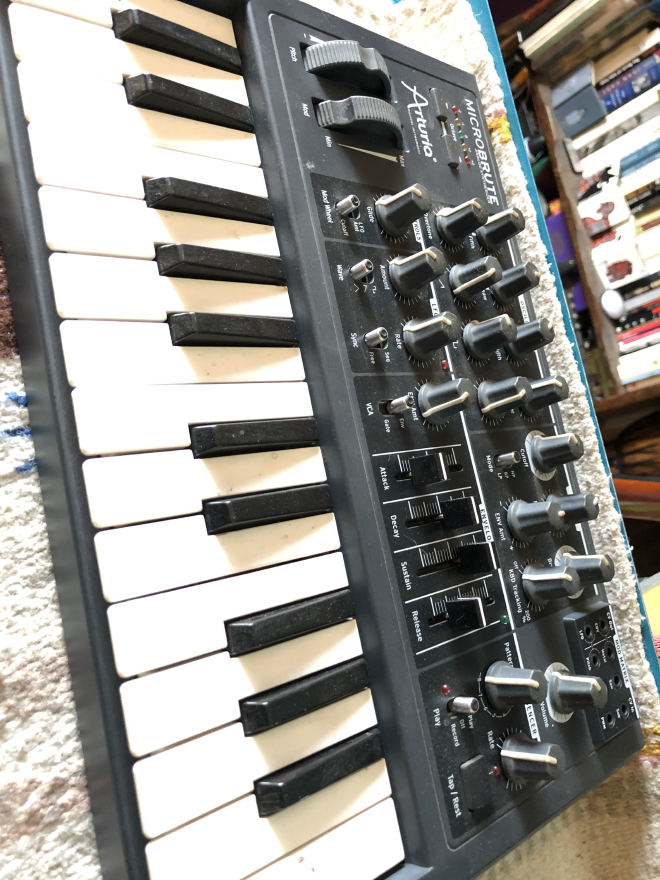
Soon I was in possession of 25 teal colored anodized aluminum knobs and 25 brass adapters. Time to clean and replace, which I did one day immediately after a draining week of job interviewing. It was a meditative process that rejuvenated both myself and the instrument.
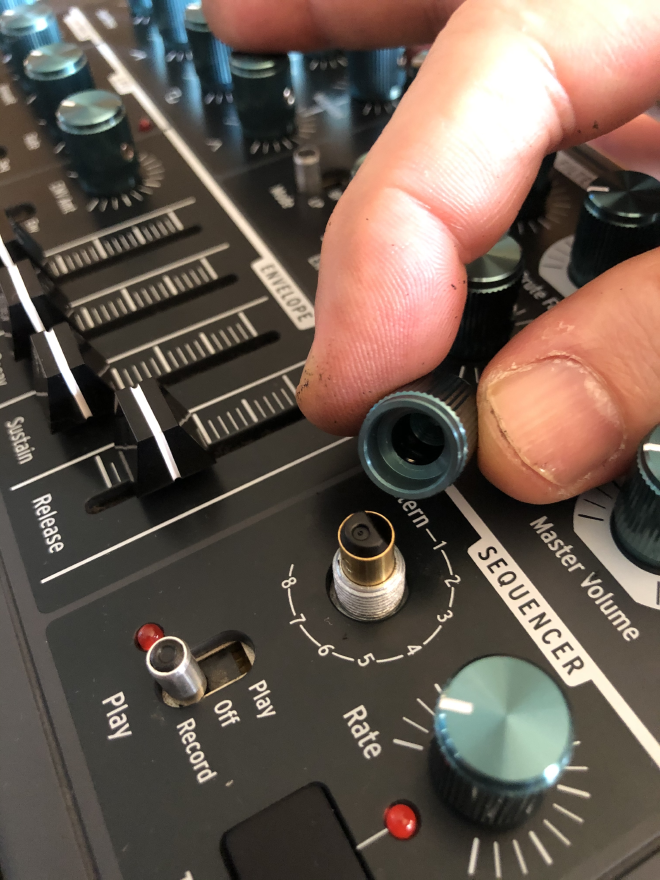
Sure enough, the skirt was so shaped and just wide enough that the knob fit snug on everything equally. With most of the knobs, I installed with the pot and pointer to the far counter-clockwise side, i.e. all the way left. The detent pot for the filter envelope I set in the middle with the pointer also at the “noon” position and the rotary switch for the sequence picker I aligned the pointer correctly with the switch at number 8.
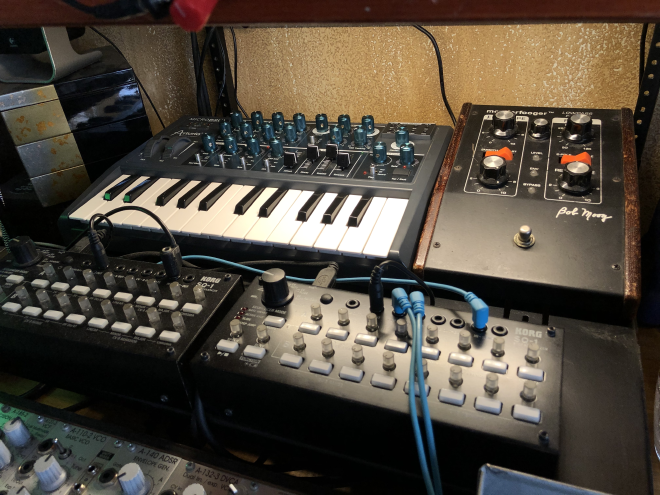
That was it. I might say the rest can be told in pictures but the reality is that the hue of the teal and depth of the shine isn’t getting captured correctly by the camera, the metal has a kind of internally radiating gleam to it. Please enjoy the gallery below all the same!!
Many thanks to Lawrence and Love My Switches for a great experience and perfect customer service! I don’t think I’ll be trying to find just the right knobs at a modular synth supplier any longer… if I could get them to carry 3.5mm jacks I’d be set. :)
Now I just have to find some crystal clear modulation wheels…